一般来说,系统都离不开认证(authentication)、授权(authentization)两个基本功能,在Spring体系下提供了SpringSecurity作为安全框架 。
简单配置
引入springsecurity只需要在pom文件中声明spring-boot-starter-security即可
<dependency>
    <groupId>org.springframework.boot</groupId>
    <artifactId>spring-boot-starter-security</artifactId>
</dependency>
接下来直接启动项目,打开 http://localhost:8080
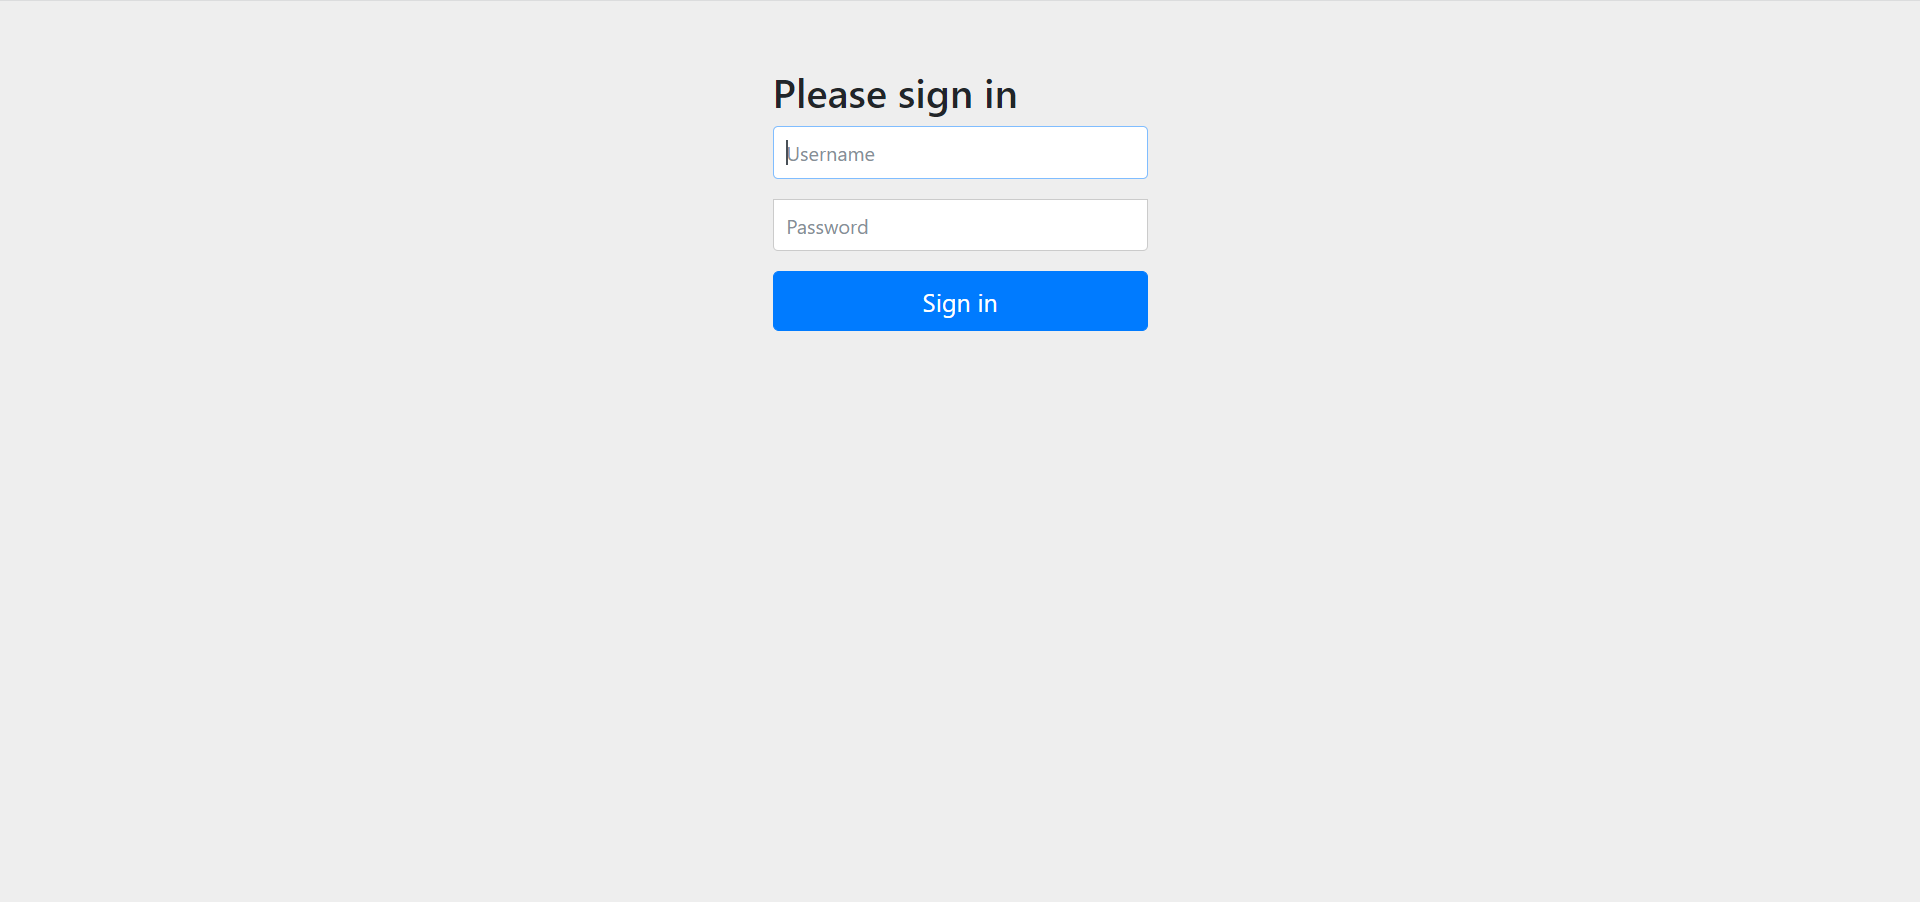
即使什么代码还没添加,资源已经被保护起来了,打开控制台,可以看到项目启动的时候已经预置了密码

输入默认的用户名user和密码,即可登录。
配置数据库用户登录
SpringSecurity通过继承WebSecurityConfigurerAdapter进行一系列安全配置
@EnableWebSecurity
public class SecurityConfig extends WebSecurityConfigurerAdapter{

    @Autowired
    private MyUserDetailsService userDetailsService;

    @Override
    protected void configure(HttpSecurity http) throws Exception {
        http.csrf().disable(); //关闭csrf配置
        http.authorizeRequests().antMatchers("/api/login", "/api/register").permitAll(); //暴露两个url用于认证授权
        http.authorizeRequests().anyRequest().authenticated();

    }

    @Override
    protected void configure(AuthenticationManagerBuilder auth) throws Exception {
        auth.userDetailsService(userDetailsService).passwordEncoder(new BCryptPasswordEncoder());
    }

    @Override
    @Bean
    protected AuthenticationManager authenticationManager() throws Exception {
        return super.authenticationManager();
    }

}
数据表SQL如下
CREATE TABLE `user` (
  `id` bigint NOT NULL AUTO_INCREMENT,
  `username` varchar(255) NOT NULL,
  `password` varchar(255) NOT NULL,
  PRIMARY KEY (`id`)
) ENGINE=InnoDB AUTO_INCREMENT=5 DEFAULT CHARSET=utf8mb4 COLLATE=utf8mb4_0900_ai_ci;
认证的关键是要有用户,SpringSecurity通过UserDetailService接口的loadUserByByUsername加载用户实体类。
@Service
public class MyUserDetailsService implements UserDetailsService{

    @Autowired
    private UserMapper userMapper;

    @Override
    public UserDetails loadUserByUsername(String username) throws UsernameNotFoundException {
        UserEntity userEntity = userMapper.selectByUsername(username);
        if (userEntity == null) throw new UsernameNotFoundException("username not found");
        return new User(userEntity.getUsername(), userEntity.getPassword(), AuthorityUtils.NO_AUTHORITIES);
    }

}
这里的User是SpringSecurity提供UserDetails接口的默认用户实现类,表示认证用户的用户名、密码、权限等信息,如果有需要可以手动实现UserDetails,定制用户实体类。
SecurityConfig使用configure(AuthenticationManagerBuilder auth)方法将userDetailsService传入,并设置密码加密的对象,一个基于数据库用户的认证机制就完成了。
接下来配置登录/注册的Controller
@RestController
@RequestMapping("/api")
public class LoginController {

    @Autowired
    private AuthenticationManager authenticationManager;


    @Autowired
    private UserMapper userMapper;

    @PostMapping("/login")
    public String login(@RequestBody UserEntity userEntity) {
        Authentication token = new UsernamePasswordAuthenticationToken(userEntity.getUsername(), userEntity.getPassword());
        Authentication authentication = authenticationManager.authenticate(token);
        SecurityContextHolder.getContext().setAuthentication(authentication);
        return "登录成功";
    }

    @PostMapping("/register")
    public String register(@RequestBody UserEntity userEntity) {
       String encodePass = new BCryptPasswordEncoder().encode(userEntity.getPassword());
       userMapper.insert(userEntity.getUsername(), encodePass);
       return "注册成功";
    }

}
在未登录的情况下访问localhost:8080,可以看到响应返回403
➜  ~ curl -i localhost:8080
HTTP/1.1 403
Set-Cookie: JSESSIONID=FF15C17570E3CF41E2C1A378D2BDACC5; Path=/; HttpOnly
X-Content-Type-Options: nosniff
X-XSS-Protection: 1; mode=block
Cache-Control: no-cache, no-store, max-age=0, must-revalidate
Pragma: no-cache
Expires: 0
X-Frame-Options: DENY
Content-Length: 0
Date: Thu, 16 Jun 2022 14:28:28 GMT
接下来注册用户并登录
➜  ~ curl -i -X POST -H "Content-Type: application/json" -d '{"username": "admin", "password": "123"}' localhost:8080/api/register
HTTP/1.1 200
X-Content-Type-Options: nosniff
X-XSS-Protection: 1; mode=block
Cache-Control: no-cache, no-store, max-age=0, must-revalidate
Pragma: no-cache
Expires: 0
X-Frame-Options: DENY
Content-Type: text/plain;charset=UTF-8
Content-Length: 12
Date: Thu, 16 Jun 2022 14:29:31 GMT

注册成功
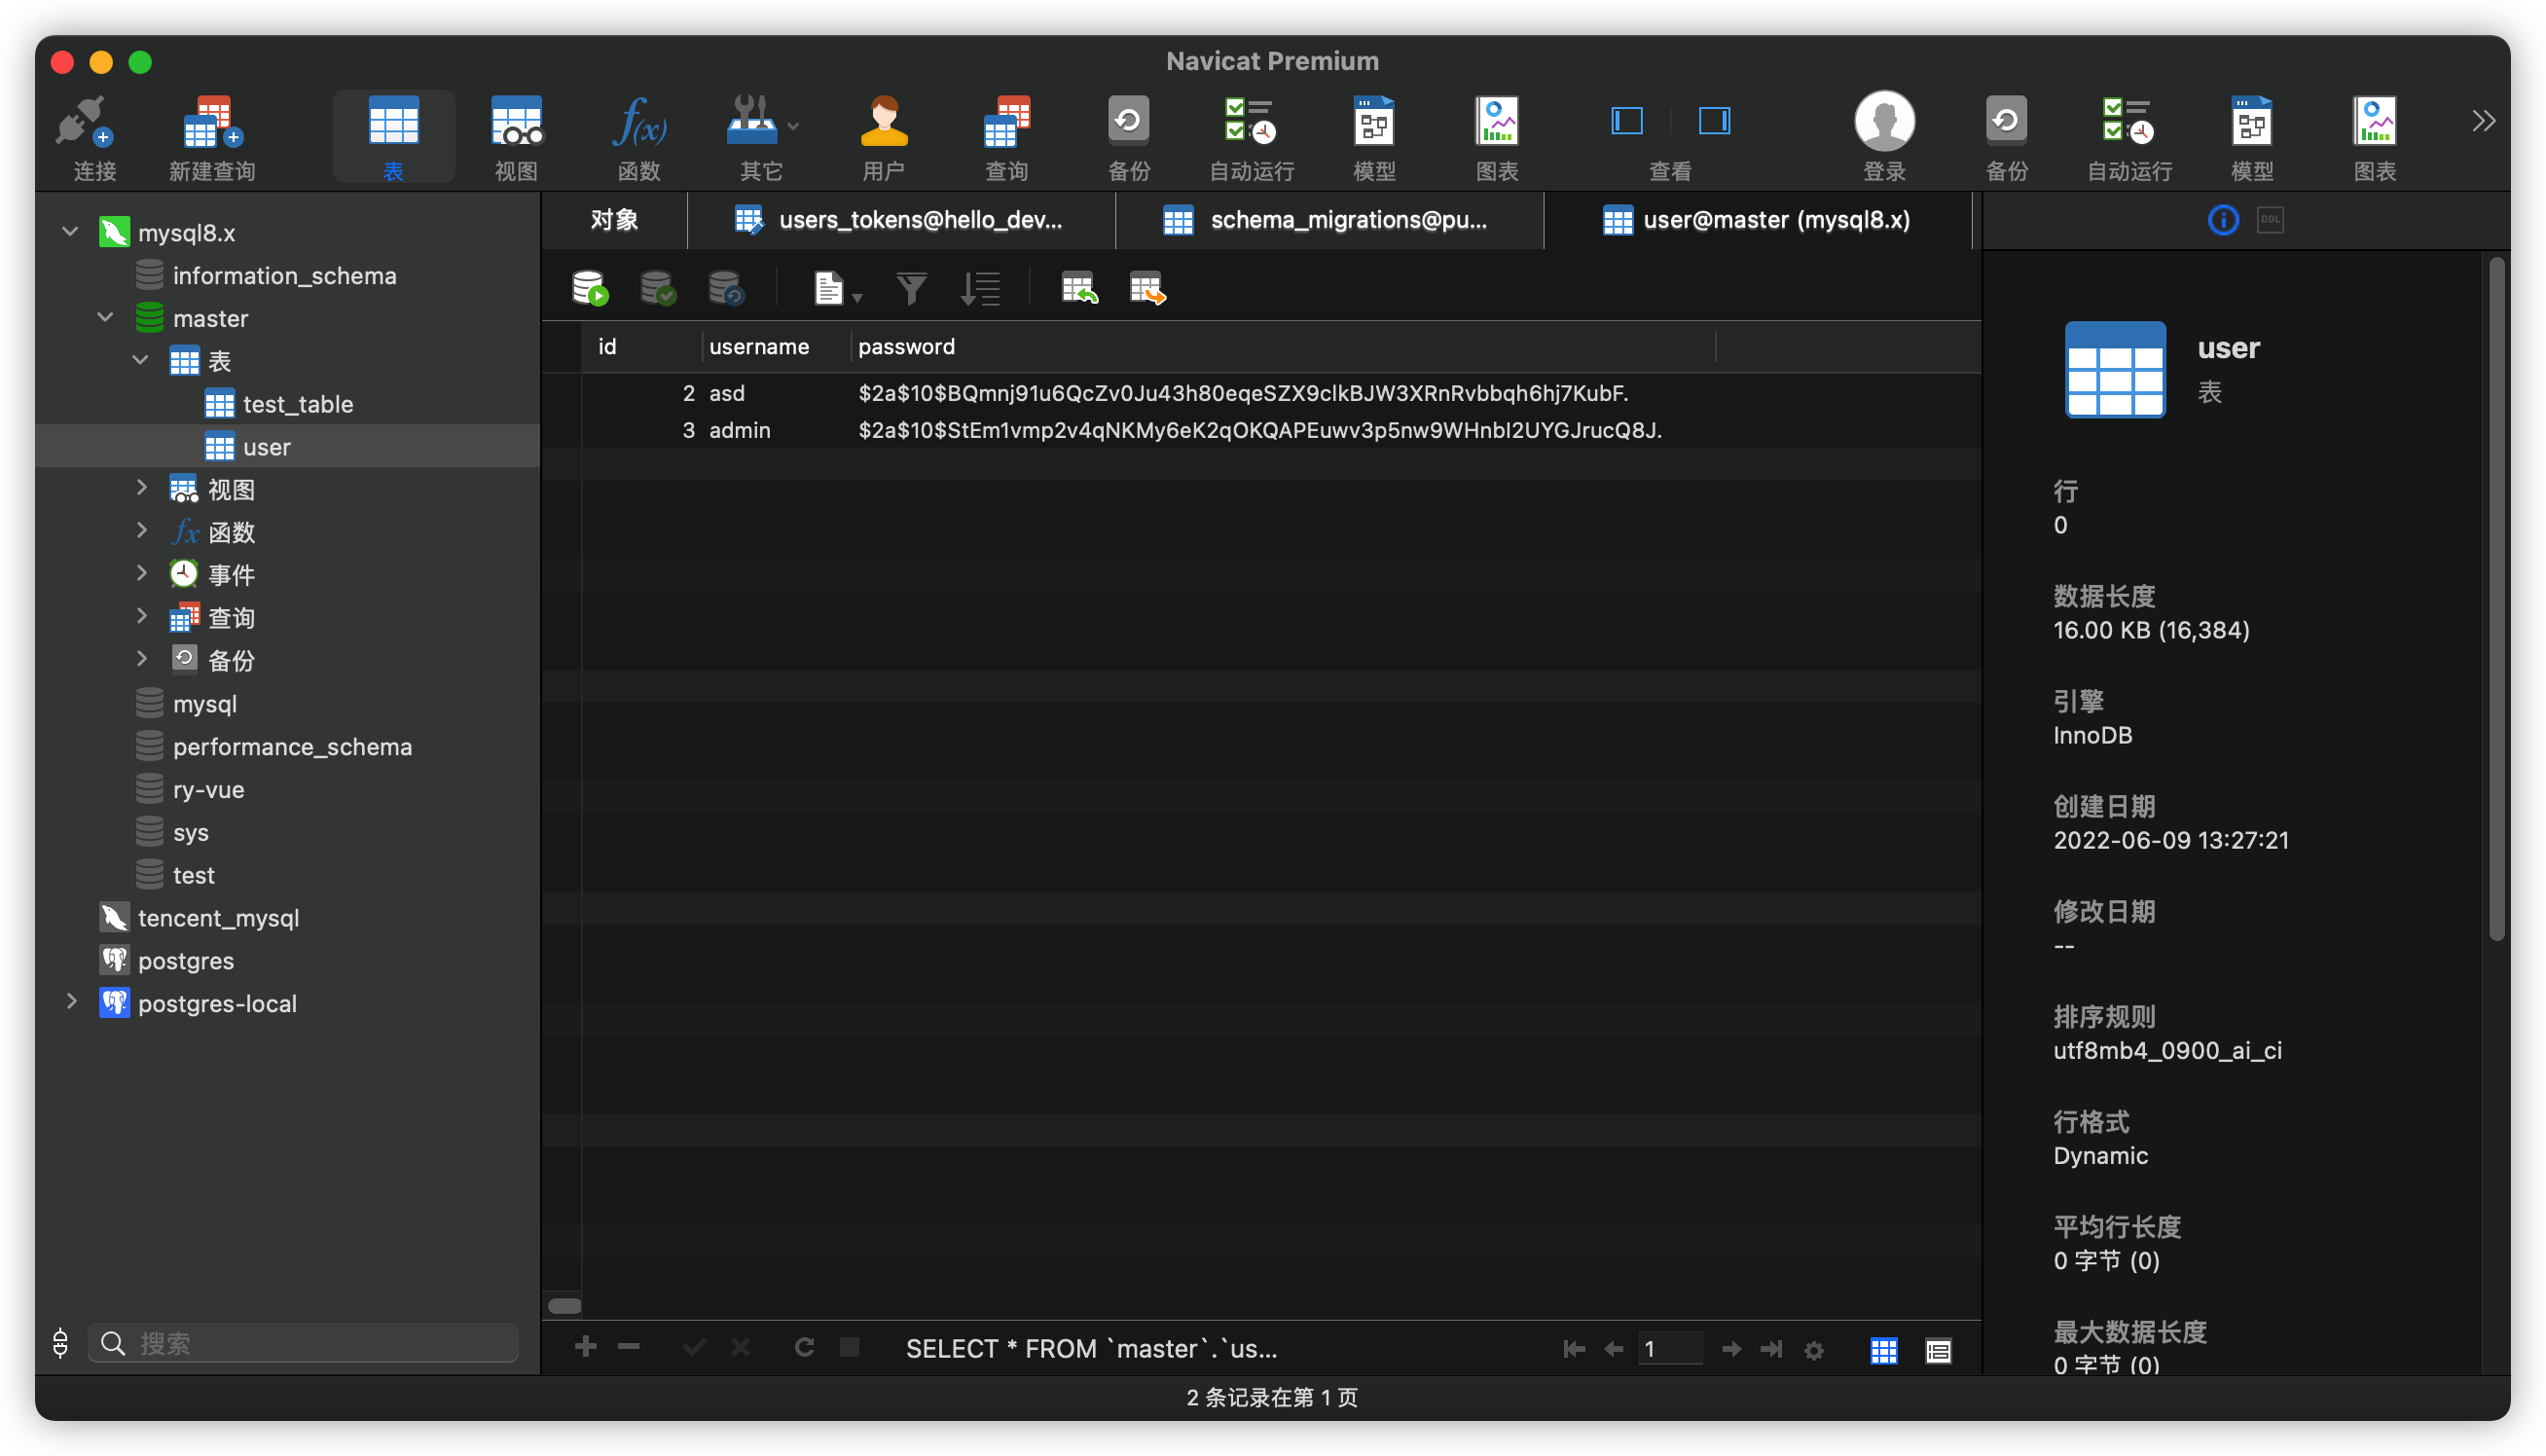
可以看到,用户已经注册成功,并且密码也是加密后的密码,接下来使用admin进行登录。
➜  ~ curl -i -X POST -H "Content-Type: application/json" -d '{"username": "admin", "password": "123"}' localhost:8080/api/login
HTTP/1.1 200
X-Content-Type-Options: nosniff
X-XSS-Protection: 1; mode=block
Cache-Control: no-cache, no-store, max-age=0, must-revalidate
Pragma: no-cache
Expires: 0
X-Frame-Options: DENY
Set-Cookie: JSESSIONID=554E49D768A65AE2E9A6099D57934FFF; Path=/; HttpOnly
Content-Type: text/plain;charset=UTF-8
Content-Length: 12
Date: Thu, 16 Jun 2022 14:30:04 GMT

登录成功
可以看到成功登录并返回了Cookie,将Cookie设置到请求体内,再次发送请求
➜  ~ curl -i -b "JSESSIONID=554E49D768A65AE2E9A6099D57934FFF" localhost:8080
HTTP/1.1 404
Vary: Origin
Vary: Access-Control-Request-Method
Vary: Access-Control-Request-Headers
X-Content-Type-Options: nosniff
X-XSS-Protection: 1; mode=block
Cache-Control: no-cache, no-store, max-age=0, must-revalidate
Pragma: no-cache
Expires: 0
X-Frame-Options: DENY
Content-Type: application/json
Transfer-Encoding: chunked
Date: Thu, 16 Jun 2022 14:24:01 GMT

{"timestamp":"2022-06-16T14:24:01.828+00:00","status":404,"error":"Not Found","path":"/"}
可以看到虽然返回404表示没有找到该页面,但是认证是已经通过的。
项目地址: https://gitlab.com/wangaiguo/for_blog.git (branch: 02-SpringSecurityJwtToken)